Hardware Overview
This page will describe the basic components needed to build a hardware platform for SMACCMPilot. There are two main components in SMACCMPilot: the mission computer (optional) and the flight controller. The mission computer manages networking with the ground control station (GCS) and hosting high-level applications (e.g., a webcam running on Linux). The flight controller executes the core flight functionality (e.g. stabilization and motor control). When a mission computer is not installed, the flight controller also manages networking with the GCS, though it does not host any high-level applications.
Flight Controller
The SMACCMPilot project uses the Pixhawk autopilot hardware. The official Pixhawk project website has information on this hardware and where it may be purchased.
Hardware Preparation
We provide a set of steps to configure your hardware for the SMACCMPilot project in the smaccmpilot-hardware-prep repository. Clone this repository and follow the steps in the README documents. This only needs to be done once even if you modify the flight controller software later.
Quadcopter Flight Platforms
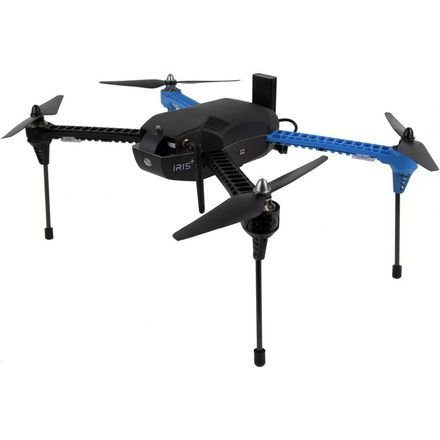
The SMACCMPilot project supports the 3DR Iris+ quadcopter, although it could be easily ported to support other Pixhawk-based plaftforms.
At this time, platforms with more than 4 motors are not supported. All motors must be PWM based, and use the first 4 channels connected to the PX4IO coprocessor.
Flight Configurations
SMACCMPilot can be used in two different configurations: Stand-alone flight and Demo flight
Stand-alone Flight
Stand-alone flight uses the stock Iris+ with added lidar and PX4Flow camera. You will also need the required accessories described below. Stand-alone flight uses only the flight controller and is a great way how to get started with SMACCMPilot.
Follow the mounting instructions to get your stand-alone hardware ready.
Iris+ ready for a stand-alone flight
Demo flight
Demo flight on the other hand requires additional hardware on top of what is needed for stand-alone flight, such as a Pixy cam and a TK1 with a daughterboad. This configuration simulates sophisticated UAVs with a mission computer, surveillance camera, and as a result, a large attack surface for potential hackers.
Attach the Pixy cam and mount the TK1 with daughterboard, and you are good to go.

Iris+ with TK1 and daughterboard
Required Accessories
Telemetry Modems
SMACCMPilot needs to communicate with a ground control station (GCS) to operate.
You’ll need a pair of 3DR Radio radio modems for bidirectional communication between the air vehicle and GCS software running on your PC.
See the 3DR Radio setup page for information on how to set up and configure 3DR Radios for use with SMACCMPilot.
RC Controller
SMACCMPilot requires a hobby radio controller for safety. See our hobby radio controller page for information on what kind of system you need, and how to set it up.
JTAG/SWD Debugger (Optional)
Developers may want to use a JTAG/SWD debugger for inspecting programs as they run on the Pixhawk. We recommend the Black Magic Probe, but various other products will work with the STM32F4 microcontroller as well.