Flight preparation
This page describes how to prepare the SMACCMPilot-powered Iris+ for flight.
Sensors calibration
For best performance during flight, we recommend calibrating your sensors. We have found out that the default out-of-the-box calibration works rather well for most Pixhawks, but proceed with caution if you skip this step.
Hardware and software setup
Double check that your have the right hardware configuration, following the prep instructions, and have successfully built the images.
Radio setup
Configure your controller as described on the Radio Control page, and familiarize yourself with the position of 3-position MODE switch and KILL switch. Your trims should be zeroed out.
Pre-flight checks
If this is your first flight, do a couple of extra checks to make sure everything works as it should.
- Upload the images and keep the vehicle powered over USB
- Launch the GCS and check the Heads-Up-Display (HUD) - the aritifical horizon should be close to leveled and with minimal yaw drift
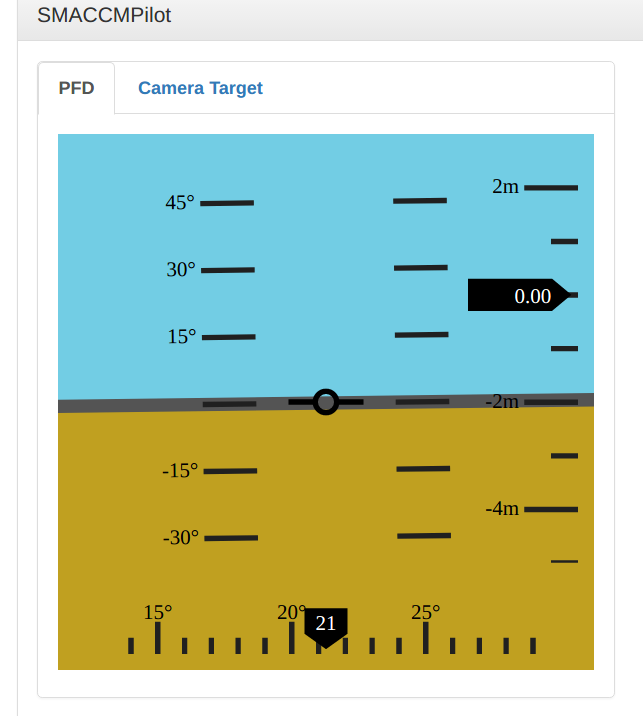
- Check the acceleration. You should see around -9.8m/s² in the z-axis, and around zero for the x- and y-axes
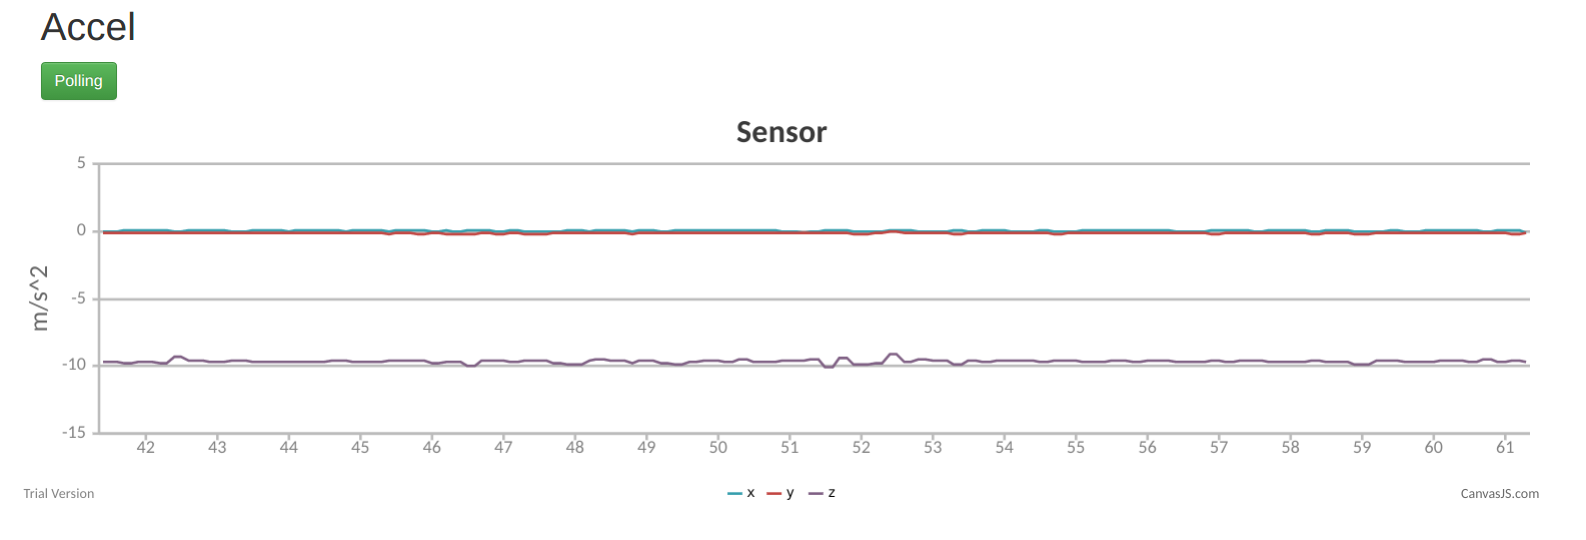
- Check the gyro. You should see very close to zero in all three axes
- Move the quadcopter by hand in the air and see if the horizon moves correspondingly
- Check the magnetometer. Ff you move the quadcopter around, you should see all three axes changing. Don’t worry about the units, the magnetic vector is normalized before it is used.
- Unplug the USB cable
Now you can move on to Arming
Arming
To arm the quadcopter:
- Turn on your radio transmitter and make sure throttle is down, MODE SWITCH is in Manual, and KILL SWITCH is ON (throttle kill)
- Plug in the battery. Try not to wiggle the airframe excessively, as it can influence the initial orientation estimate.
- You will hear two beeps from the motors (yes, the motors can play sounds). It means the motors are alive.
- Press the red button on top of the Iris+ until you hear a third beep from the motors. It means the motors are ready and listening to commands.
- Check the GCS HUD. The aritificial horizon should be more-or-less leveled with minimal yaw drift
- Unkill the KILL SWITCH by moving it up and towards yourself with your index finger
- Arm the motors by briefly pushing the yaw stick to bottom right
Take-Off
For your very first flight you should try to increase the throttle very slowly, and when the quadcopter is just about to take off (around 60% of throttle), give it small roll/pitch/yaw inputs to see if it responds correctly to your commands. If it doesn’t, go back to the Radio Control page and make sure your radio is set up correctly. Note that this near-takeoff phase induces lot of vibration in the airframe and can confuse the attitude estimator. That is OK, because in pracice we will never dwell here for long. The HUD might get some offset, but it should never diverge.
Once you are sure your quadcopter responds properly, go ahead and increase the throttle. For all future take-offs, we recommend taking off rather quickly: ramp up the throttle to ~70% and get off the ground fast, as it minimizes the period when the estimators aren’t as effective (and also looks way cooler).
Trim
The next step is to trim the quadcopter. Trim adds a constant input to each of the roll/pitch/yaw axes to counteract the imbalance in the airfame, imperfect motors, and small biases in the attitude estimation. It holds the stick in place for you to make it easier for the you to control. The goal of the trim is to have the quadcopter in an almost perfect hover without any stick movement.
Before you start, make sure all your trims are zeroed out. Click the trim buttons until you see the little black circle on the transmitter display for each axis over a little black square, and you hear a slightly longer beep.

RC trims
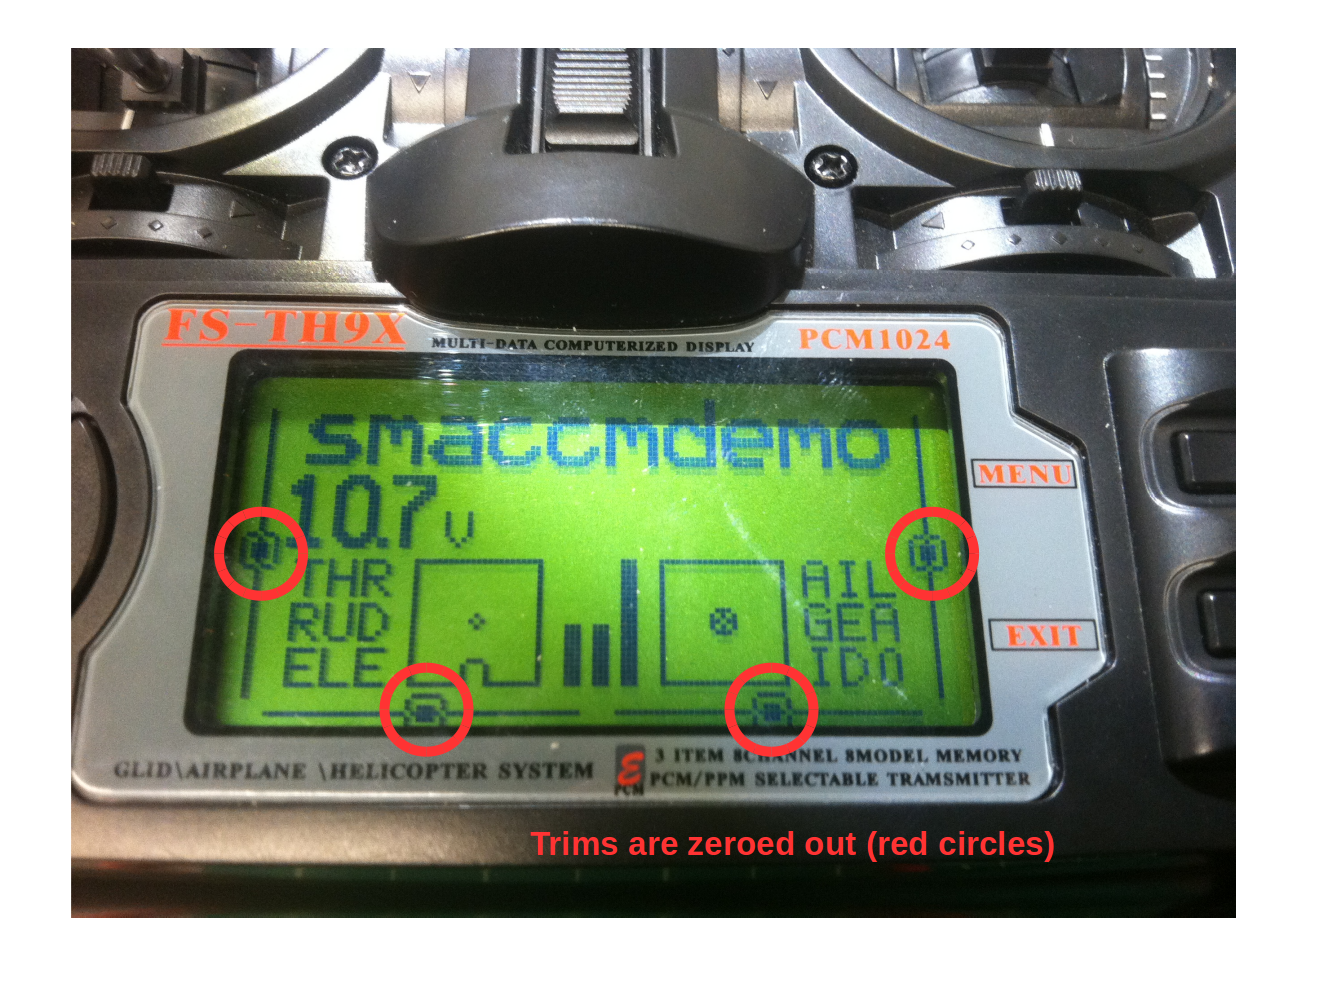
Zeroed trims
Trim procedure
- Take-off and fly the quadcopter in manual mode
- Achieve a steady flight, and let go of the right (roll/pitch) stick briefly. Notice where the quadcopter leans (left, right, forwards, backwards)
- Land the vehicle
- Move the trim button for the respective axis a few clicks away from the direction the vehicle was leaning
- Repeat from step 1 until the quadcopter stops leaning in any direction
Example
- I notice the quadcoper is rolling left when I let go of the stick. That means to counteract this, I need to move my roll stick to the right. I land, and give a few clicks right on my roll trim. I repeat until the left rolling tendency disappears.
- I notice the quadcopter is pitching forward. I have to trim the roll a few clicks down as if I was countering the forward pitch with my pitch stick.
- When roll and pitch are trimmed, I focus on yaw. In stable flight, I notice that the quadcopter slowly turns right without any yaw input. I land and give a few clicks left on my yaw trim, to counter it.
Here is an example of a radio transmitter trimmed for a particular quadcopter:
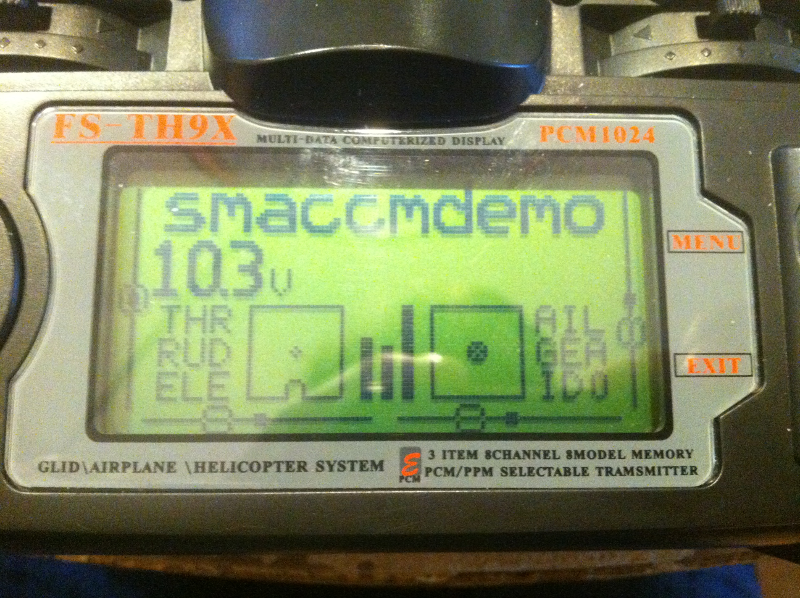
Trimmed radio
Altitude hold
Once you trimmed the quadcopter, it is time to try altitude hold. There are two things to do before a succesfull alt-hold:
- Fly in manual mode and observe your nominal throttle level for a stable hover. That is, what throttle level makes the vehicle hover at a more-or-less constant altitude. You can use alt-setp interface to see the control input (bottom plot). For our Iris+ without the mission computer, the nominal throttle is around 65%, with the additional weight of the mission computer it is closer to 70-75%
- Make sure your battery is fully charged
- Change the nominal throttle in tuning.conf accordingly. The value has to be between 0 and 1, so 70% will be 0.7
- Recompile and upload the flight computer software
To operate alt-hold:
- Take off in manual mode, and bring the quadcopter to a leveled flight
- Flip the mode switch into Alt-hold mode
- Bring the throttle stick all the way to 100% to give the controller full authority
- Enjoy!
- To land, you can either slowly lower the throttle until the quadcopter descends to the ground (easier), or lower the throttle close to the nominal hover throttle and then switch back to manual mode (more advanced)
Troubleshooting:
- The quadcopter loses altitude even though the throttle stick is all the way to 100%: try increasing the I-gain by a small amount
- The quadcopter climbs slowly and never stops: make sure your nominal throttle is set properly, and perhaps lower it by a small amount
GCS input mode
The last step is the GCS input mode. In this mode, the RC controller inputs mix with the GCS operator inputs. That way the operator can steer the vehicle where they want, while the pilot can always step in.
As the RC operator:
- Take off and go to Alt-hold mode
- Once in a good alt-hold, switch to GCS input mode
- Steady the quadcopter, center the sticks (and be ready to step in if needed)
- Have the GCS operator to steer the quadcopter as needed
- To come back, you can switch back to Alt-hold at any point, and land as normal
Have fun!