Demo Flight
The SMACCMPilot demo consists of two scenarios: a successful attack and a failed attack. Both attacks start from the assumption that the attacker has root access on the Linux VM hosting the camera software. The attacker is then looking to escalate his access and/or compromise the mission. In the successful attack the attacker is able eventually able to take over complete control of the vehicle while preventing the legitimate ground control station (GCS) from accessing the vehicle. In the failed attack the attacker is unable to do anything beyond temporarily taking down the camera.
Common Setup
- The GCS operator needs a copy of the GCS software
- The GCS operator needs a copy of the camera demo software.
- The GCS operator needs a 3DR radio on the same channel as the vehicle
- The TK1 should be configured to automatically join a wireless network on boot and start the camera demo software
- The demo software should be launched with:
./demo <ip-address- of-GCS>; - The attacker needs SSH access to the vehicle
- Safety pilot (PPM controller) for take-off, landing, stabilization as needed.
Friendly GCS
The Successful Attack
This attack assumes the unsecured version of the mission computer. See attack details for more info.
Configuration ahead of time
- The GCS operator and attacker each need a 3DR radio using the same channel as the vehicle. Thus you’ll have three 3DR radios in total, all on the same channel. Only two will ever be powered at the same time. Do not ever power all three simultaneously.
- The attacker needs a copy of the GCS with the last 8 bytes of both keys changed to all zeros. That is, modify
keys.confto look like:
[symmetric_key.server_to_client]
keysalt = [ 1, 2, 3, 4, 5, 6, 7, 8,
            9, 10, 11, 12, 13, 14, 15, 16,
             0, 0, 0, 0, 0, 0, 0, 0]

[symmetric_key.client_to_server]
keysalt = [ 24, 23, 22, 21, 20, 19, 18, 17,
            16, 15, 14, 13, 12, 11, 10, 9,
0, 0, 0, 0, 0, 0, 0, 0]- The attacker needs a copy of the camera demo software.
- The smaccm camera_demo and vm_hack repositories should be checked out on the vehicle (they are under
/root/folder). - The file
camera_demo/attack.pyshould be customized with the GCS IP address and the attacker IP address - You may need to install some libraries for python and curses in order to run the attacks
Live Step-by-step
- Vehicle starts in friendly territory.
- Maintenance person loads the unsecure image onto the TK1 (e.g. via red USB stick)
- Insert stick into USB 3.0 port (near power jack)
- Push reset button
- Wait 10 seconds (camera light will flash during this time)
- Ensure Pixhawk is armed
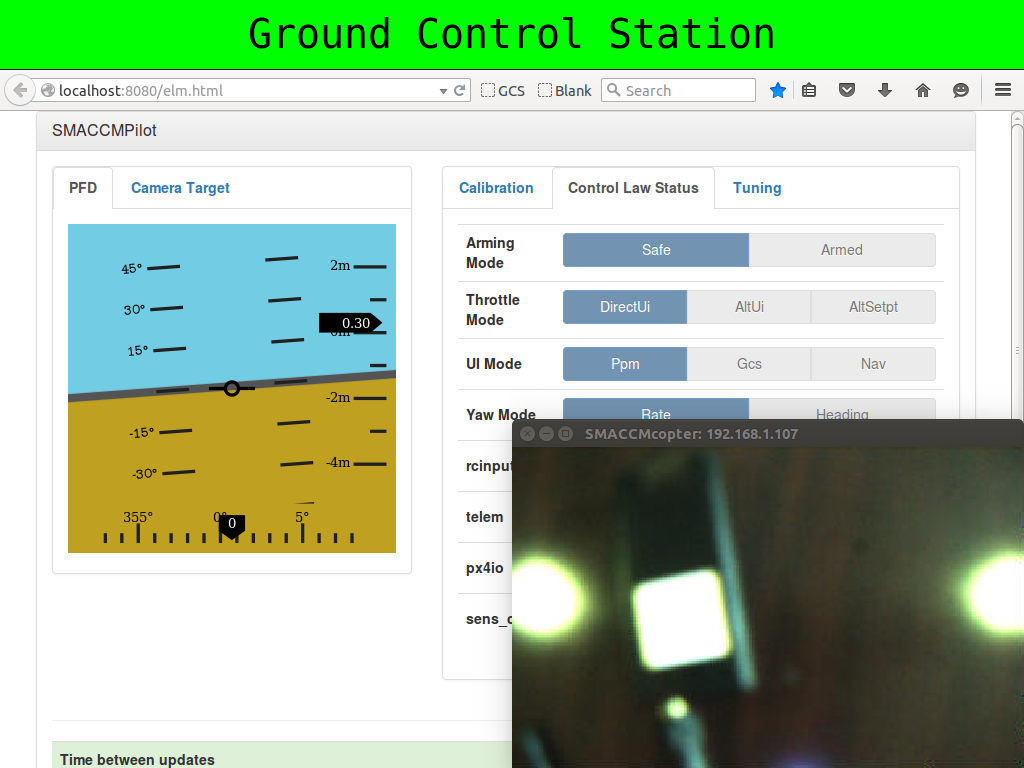
- GCS operator loads GCS and camera software, establish connection/display
- Safety pilot starts vehicle and takes off (in manual mode). Hover at approx. 6 ft. altitude.
- Safety pilot switches to GCS mode
- GCS operator takes control of vehicle and flies vehicle left and right in the flight area at constant altitude
- Attacker SSHs into TK1 via WiFi
- Attacker runs
vm_hack/attack.py(press ‘space’ to advance the animation/attack). The GCS will lose telemetry and control. - Attacker will start up his GCS software
- Attacker has control and flies the vehicle via his GCS, causing it to fly left and right.
- Video attack is triggered by Attacker (using a separate laptop)
- Attacker takes control of WiFi video
- Attacker runs
camera_demo/attack.py
- Attacker runs
- This will send the skull animation to the GCS and send correct camera image to the attacker
- The Attacker Pilot controls the vehicle via his GCS and moves it to enemy territory.
- At the end of the demo, the safety pilot lands the vehicle.
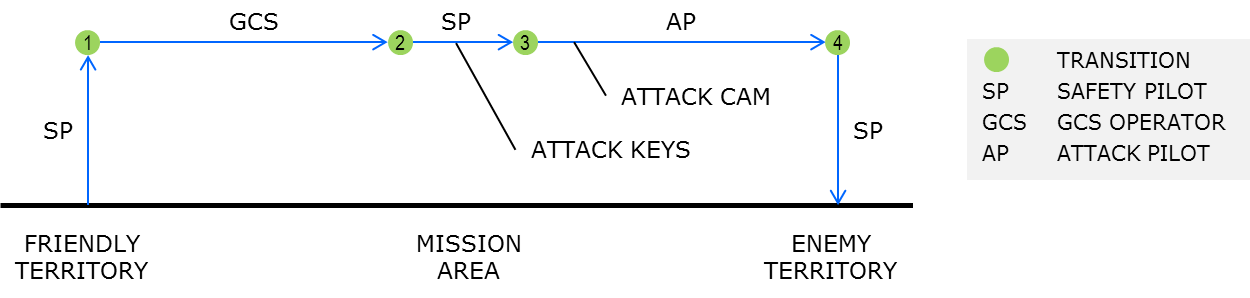
Flight path during successfull attack
The Failed Attack
This scenario assumes the secured version of the mission computer image.
Configuration ahead of time
There is no extra configuration for the failed attack. GCS reinstalls his 3DR radio. The attacker’s 3DR radio is disconnected and never used.
Live Step-by-step
- Vehicle starts in friendly territory.
- Maintenance person loads the secure image onto the TK1 (e.g. via blue USB stick)
- Insert stick into USB 3.0 port (near power jack)
- Push reset button
- Wait 10 seconds
- Ensure Pixhawk is armed
- GCS operator loads GCS and camera software, establish connection/display
- Safety pilot starts vehicle and takes off (in manual mode). Hover at approx. 6 ft. altitude.
- Safety pilot switches to GCS mode
- GCS operator takes control of vehicle and flies vehicle left and right in the flight area at constant altitude
- Attacker SSHs into TK1 via WiFi
- Attacker runs
vm_hack/attack.py(press ‘space’ to advance the animation/attack). The attack will fail.
- Press
qorCtrl-cto quit
- GCS operator resumes flying vehicle left and right.
- Attacker runs
vm_hack/forkbomb.py
- This will display a little randomized animation for a bit, then do a real forkbomb
- The attacker’s terminal will freeze up
- The GCS’s camera view will show the camera being disconnected
- The GCS operator clicks the reboot button
- The Linux VM should take less than 12 seconds to reboot
- At this point the GCS is back to its initial state and the attacker’s terminal is frozen.
- The GCS operator flies the drone back to friendly territory.
- At the end of the demo, the safety pilot lands the vehicle.
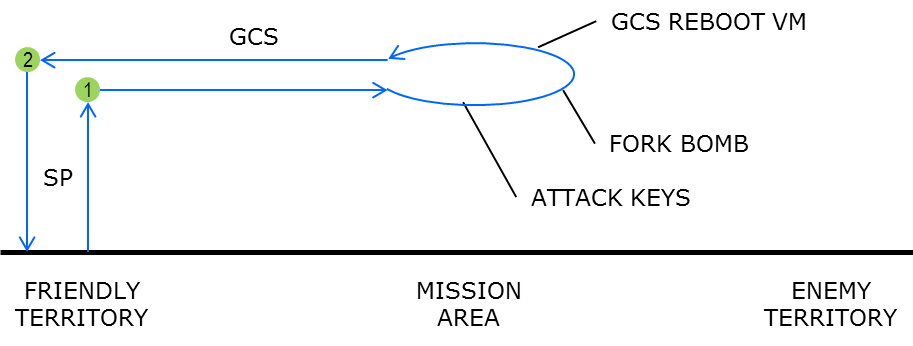
Flight path during unsuccessfull attack